Part 1: DNS & Domain Name Management
This section covers what is a DNS and how to manage a domain name for a new client
The first step of the process is to make sure we have the ability to manage a domain name. There are 2 common scenarios in this:
-
Case 1: You bought the domain through a Registar (for example godaddy) and you have full control through that registar. You want to host the website and the emails on the US server
Note: You can also see the Cloudflare Part explained in the following 1-5 steps in a short instructions video here-
Login on Cloudflare and click the "Add a Site" button.
-
Enter the domain name, WITHOUT any https or www before. ie: example.com and click "Add site". In order for this step to work the domain needs to be already bought/activated properly first in godaddy.
-
Select the "Free" plan and click "confirm".
-
Cloudflare will try to scan and find your current dns/domain settings. After this is done just click "Continue"
-
On the screen Cloudflare will tell you which nameservers links you need to replace to your current registrar (GoDaddy in our case). Copy/paste them in a notepad if you want as we need them for the next steps. Their step by step instructions should be pretty explanatory but are added here as well. Click "Continue".
-
Login on your registrar(goDaddy) and on your admin panel find the domain you want to manage (it should the same you created in Cloudflare)
-
Remove the previous default nameservers and replace them with the ones from step (5) that Cloudflare gave you.
-
Allow 24-72 hours to pass for propagation to complete (normally it is much faster within the day or the hour) and after that you should have the total control of the DNS transfered to Cloudflare
-
After the propagation is completed login on Cloudflare and search for the domain that you created/transfered to Cloudflare
-
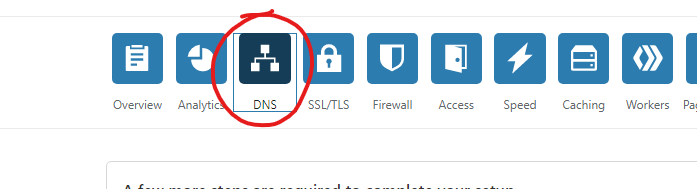
Click on the "DNS" icon at the top of screen
-
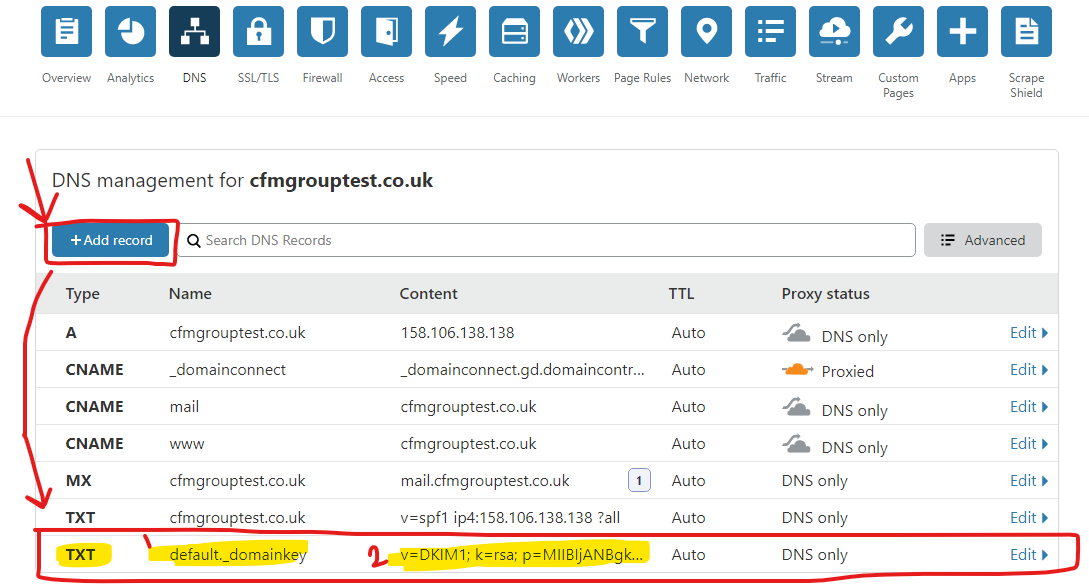
Make sure the DNS records look something like the image bellow. If there is a _domainconnect CNAME record leave it as it is as it is from clousflare.
If you want to edit a record just click on it.
If you want to add a new record click the Add record button -
You need one A record called * (asterisk symbol) that will have the following IP: 158.106.138.138 (which is the server IP of your hosting US Server). Make sure the little cloud icon on the "Proxy status" is grey and says "DNS only". (you can change that by clicking on it)
-
You need one A record called your domain name (example.com, without any https or www) that will have the following IP: 158.106.138.138 (which is the server IP of your hosting US Server). Make sure the little cloud icon on the "Proxy status" is grey and says "DNS only". (you can change that by clicking on it)
-
You need one CNAME called mail that will have the following value: your domain name (example.com, without any https or www). Make sure the little cloud icon on the "Proxy status" is grey and says "DNS only". (you can change that by clicking on it)
-
You need one CNAME called www that will have the following value: your domain name (example.com, without any https or www). Make sure the little cloud icon on the "Proxy status" is grey and says "DNS only". (you can change that by clicking on it)
-
You need one MX record called your domain name (example.com, without any https or www) that will have the following value mail.example.com. Same line in the Priority field just add number 1
-
You need one TXT record called your domain name (example.com, without any https or www) that will have the following value: v=spf1 ip4:158.106.138.138 ?all
You can leave the rest of the generated stuff as they are
Important Note: There is also an extra DNS record you need to add in order to secure emails more, but you can do it only after you setup the hosting account on the US Server. You can find in a latter section (Email Section) by clicking here

Wait a couple of hours to the next day (sometimes even minutes) and the US Server should now be ready to host the new website/emails
-
-
Case 2: A client bought/already owns a domain through their Registar (for example through their personal godaddy,namecheap,anything etc) and they asked you to manage only the hosting part, nothing else
In this case since the client doesn't wish to transfer their DNS/management of the domain to you totally then you should't involve your Cloudflare at all but do the following:
-
Login through their registrar admin panel(names.co.uk, GoDaddy, whatever they give you).
-
Through their admin panel find the domain they asked you to manage
-
You need one A record called your domain name (example.com, without any https or www) that will have the following IP: 158.106.138.138 (which is the server IP of your hosting US Server)
-
You need one CNAME called www that will have the following value: your domain name (example.com, without any https or www)
-
If and only if they ask you to host emails as well, make sure that they do not have any existing emails already or else they will be lost.Transfering emails from one host to another is a big subject/project that is not covered here. After you are certain that they are happy for you to host their new emails then add the following:
-
You need one MX record called your domain name (example.com, without any https or www) that will have the following value mail.example.com. Same line in the Priotity field just add number 1
-
You need one CNAME called mail that will have the following value: your domain name (example.com, without any https or www). Make sure the little cloud icon on the "Proxy status" is grey and says "DNS only". (you can change that by clicking on it)
-
You need one TXT record called your domain name (example.com, without any https or www) that will have the following value: v=spf1 ip4:158.106.138.138 ?all
-
Important Note: There is also an extra DNS record you need to add in order to secure emails more, but you can do it only after you setup the hosting account on the US Server. You can find in a latter section (Email Section) by clicking here
-
-
Wait a couple of hours to the next day (sometimes even minutes) and the US Server should now be ready to host the new website/emails